Skins/Data and Execute
A component can be executed from the web client where the user enters input data. This data can be saved to the repository or saved privately in the user’s browser. Later it can be found and used again from the Skins/Data menu.
A saved input data is also called a skin because it is possible to make a graphical skin on top of the data. The skin only exposes selected input/output fields and it provides an optional custom label for each field.
Table/Tree View
The data is shown in a tree structure be default. If the number of fields becomes too large it will decrease performance of the browser and instead data will be presented in a table. The table view performs much better and also has the ability to filter data items based on a search string. It is possible to switch back and forth between table and tree view by clicking the Table button.
Options
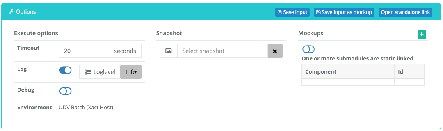
When executing a component, several options can be set. Click the ![]() button to open the options panel. The timeout defines the number of seconds before the browser will time out, log level is the number of details Functional Test will log during the execution. The log will be available in the web client after the execution. The Debug toggle is for starting a debug session in RDz/IDz for the provided host user ID. A Dataset skin is used when testing a main batch program and finally stubs are used for stubbing sub modules to the module that is called.
button to open the options panel. The timeout defines the number of seconds before the browser will time out, log level is the number of details Functional Test will log during the execution. The log will be available in the web client after the execution. The Debug toggle is for starting a debug session in RDz/IDz for the provided host user ID. A Dataset skin is used when testing a main batch program and finally stubs are used for stubbing sub modules to the module that is called.
Skin
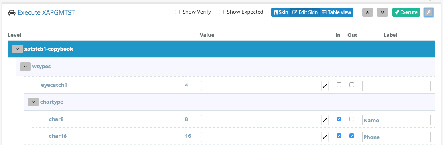
The skin part of the data is defined at the same page where input data is entered. Click the Edit skin button, and three additional columns will show. An In and Out columns let you check if a field should be shown as input or output and the Label column lets you define a custom label.
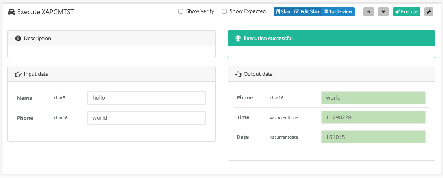
Click the Skin button to see the skin. The skin view will be opened by default if there are any skin data defined in a saved skin/data.
The component can be executed from the skin view and the result will be presented in the same view. It is possible to switch between skin and normal view by clicking the Skin button.
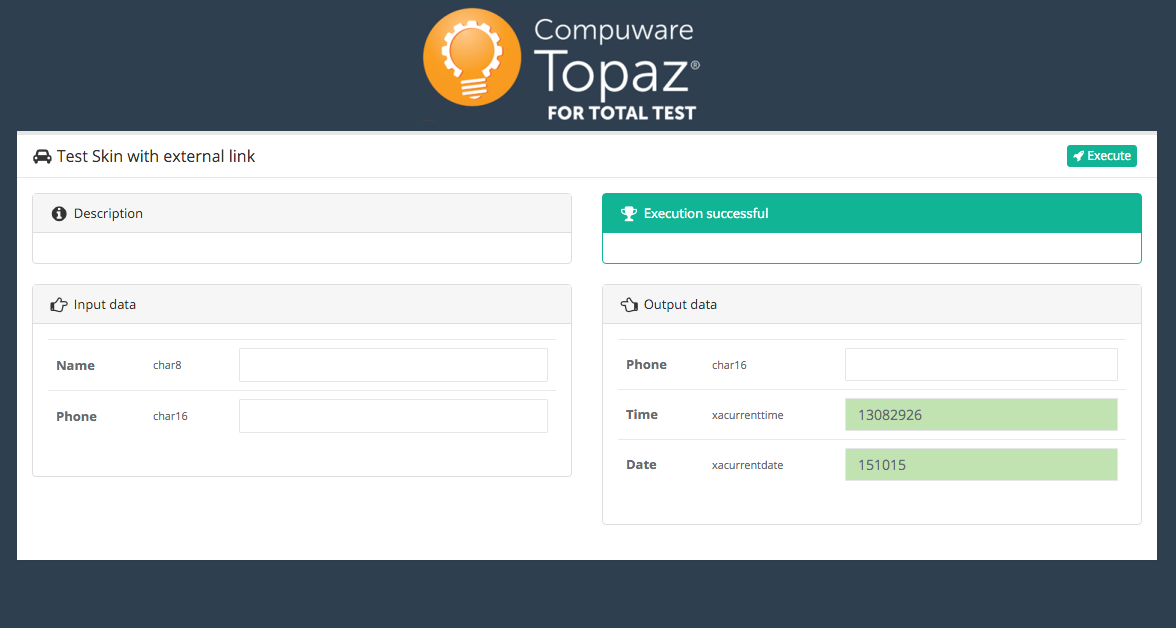
External Link
The skin can also be opened in a separate link that will only show the skin and not require authentication. This requires the component to have allowed execution without credentials and the skin to be saved as public data. Open the external link by clicking on the ![]() button and click the Open external link in the Options panel. The separate link can be used by UI based test runners like Load Runner to automate a test of the component through the Skin.
button and click the Open external link in the Options panel. The separate link can be used by UI based test runners like Load Runner to automate a test of the component through the Skin.
Saving Data
The Data or Skin is saved by showing the Options panel and click Save input. A dialog shows up and will ask to save as private or public data or save the input as a test scenario.