Verifying Data
A real test scenario will always contain steps for verifying that data is as expected. The test should fail if data is not as expected. In Functional Test data from components, files and database tables can be verified with four approaches.
Define an expected value or a verify expression for each field in a component execution.
Add a Verify element to the test scenario and define expected and actual values by using expressions and or DataReference elements.
Save an execution result as validation data.
Verify output datasets, spoolfile content and Db2 content.
The approaches can be used in any combination in a test scenario. We now describe how to use each approach.
Expected Values and Verify Expressions
The Component element in a Functional Test Scenario contains the input/output data definition for the component execution. On each field, it is possible to define an expected value or a verify expression. Functional Test will compare the result from the component for the specific field with the expected value or it will evaluate the verify expression. The result will get a Failed state if the expected value is not equal to the result or if the verify expression evaluates to false.
The expected value can be a hardcoded string, and it can also be an assignment with a JavaScript expression. The expression can refer to data in Referenceable elements that have been executed earlier in the test scenario. Read more about using expressions in the chapter about language elements. The expected value must start with a = if a JavaScript assignment is used. The examples below are all valid expected values.
<char8 expected="hello">hello</char8>
<char16 expected="='w'+'ORLD'.toLowerCase()">world</char16>
<bin8 expected="=somevar.A[0].B" />
The verify expression is always a JavaScript expression and it must evaluate to true or false. The state of the Functional Test Scenario will be Failed if it evaluates to false. Verify expressions are used when it is not possible to enter an expected value. An example could be a timestamp. Then it is possible to write a verify expression that evaluates if the value is valid, for instance by matching it against a regular expression.
<eyecatch2 verifyExpression="value.length ==2" />
<bin2 verifyExpression="value == 5" />
<bin4 verifyExpression="new RegExp('^[0-9]{8}$').test(value)" />
The approach can be used in both clients. In the web client, the values are defined when executing a component. The Expected and Verify expression input fields become visible when the two check boxes are checked. Then values can be entered. The small arrow icon in each input field will open a small JavaScript editor where expressions can be entered and evaluate before it is inserted. Input data including expected values and verify expressions can be saved as an Functional Test Scenario at the server. In Eclipse, the values can be entered at each field when a Component element is selected. It can also be entered manually in the XML.
The Verify Element
The Verify element can be used to execute a verify expression or to compare two values from different sources in the test scenario. The element is quite simple. It contains an expected element and an actual element or a statement element with an expression. The Functional Test Scenario will get a Failed state if the two values are not equal or the verify expression evaluates to false. The value of each element can be a simple string or it can be a complex data structure. The expected and actual elements either have an expression defined on the element or have child elements. The child elements can be hardcoded data or a Replaceable element such as a Reference or an Expression element. When the expected and actual values are plain text, it is also possible to setup Compare Rules that can include or exclude parts of each line/record in the data.
See details about the Verify element here.
Saving Execution Result as Validation
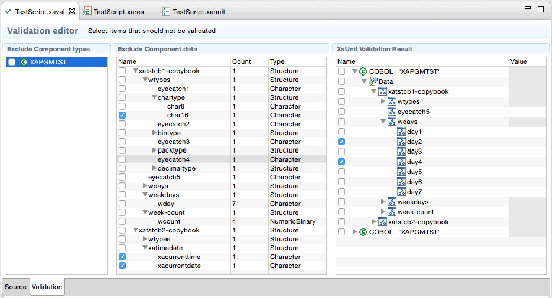
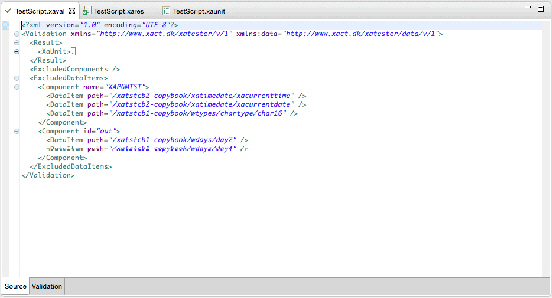
In Eclipse, the complete result from an execution can be saved as a validation file. This approach cannot be used in the web client. The validation file is created when a user clicks the Save as validation button in the top right corner of the Execution result editor. This will create a new .xaval file next to the xaunit file. At next execution, the new result will be compared with the result stored in the xaval file. The result will be in Failed state if there are any differences. Often a result will contain fields that will change for each execution. Such fields can be excluded from the validation file by opening it with the Validation editor. It is illustrated below. The Editor has two panes, a source pane and a graphical pane. The graphical Validation pane (Validation Editor with the Graphical Editor) lets you exclude whole components from the validation (left), specific fields for a component (middle) and specific fields on specific execution calls in the test scenario. It’s typically the middle option that is used. The source pane (Validation Editor with the Source Shown) lets you define the exclude rules in plain XML.
Validation Editor with the Graphical Editor
Validation Editor with the Source Shown
When uploading a Functional Test Scenario to the server and there exists an xaval file, this file will also be uploaded. Hence, the server is also able to use the validation file when the Functional Test Scenario is executed through the browser or by a schedule.